
Professional Installation
Convenient Service
Trailer Hitches
Bike Racks
Running Boards
Roof Rails

Subaru Outback (2020–Present) Hitch Installation
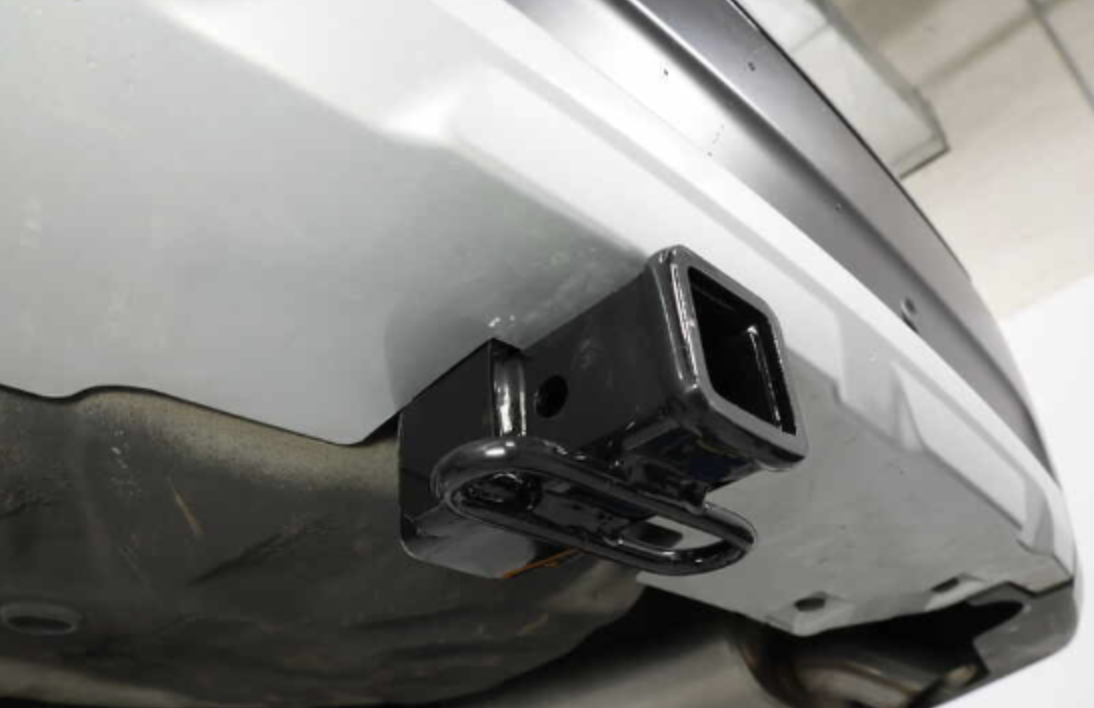
Accessing the Outback’s Structural Mounting Points
Installing a trailer hitch on a 2020–present Subaru Outback is more involved than simply bolting a hitch underneath the vehicle. The process begins by carefully removing the factory fasteners beneath the rear bumper and inside the wheel wells. If the vehicle has mud flaps, those are removed and retained for reinstallation.
The rear bumper cover is then separated from the vehicle. Any parking sensors or other electrical connections are carefully disconnected so the cover can be removed without damaging the wiring, trim, or body panels. With the cover out of the way, the factory bumper reinforcement beam is temporarily removed. Its original hardware is retained for reassembly, giving us clear access to the Outback’s structural mounting points.
Towing Capacity: 3,500 lbs
Tongue Weight: 350 lbs
Installation Time: Up to 1.5 hours
Ready to Get Your Vehicle Set Up?
Skip the shop. Skip the wait.
Get your vehicle ready for lake days, mountain weekends, and family adventures — with professional installation completed at your home.
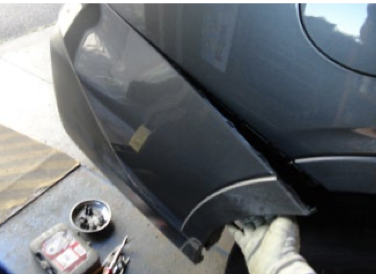
1. Careful Removal of the Rear Bumper Cover
To properly mount the hitch to the factory frame points, the rear bumper cover must be safely removed.
We carefully remove the factory fasteners from underneath the vehicle and inside the wheel wells. If your Outback is equipped with mud flaps, those are removed first and reinstalled at the end of the process.
The bumper cover is then gently separated from the body and set aside. If your vehicle has rear sensors or electrical connections, those are safely disconnected and reconnected during reassembly.
This step allows us to access the structural mounting points without damaging trim or body panels.
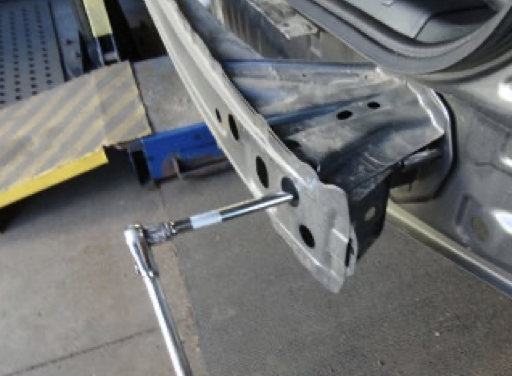
2. Removal of the Factory Bumper Beam
Behind the bumper cover sits the factory bumper reinforcement beam. This component must be removed temporarily so the hitch can be mounted correctly to the frame.
All factory hardware is retained and reused where required, maintaining Subaru’s structural integrity.
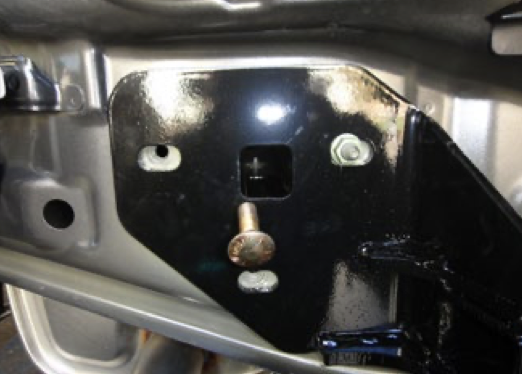
3. Precision Hitch Mounting to the Frame Rails
The hitch is positioned directly onto the vehicle’s frame rails using the manufacturer’s designated mounting points.
We secure the hitch using supplied hardware and factory fasteners, ensuring proper alignment and structural support.
Everything is installed according to manufacturer specifications.
4. Reinstallation of the Bumper Beam
Once the hitch is secured in place, the factory bumper beam is reinstalled over the hitch assembly.
This step ensures the vehicle retains its structural protection and proper fitment.
5. Proper Torque Specifications
All hardware is torqued to exact manufacturer specifications using calibrated torque tools.
This is a critical step. Under-torqued hardware can loosen over time. Over-torqued hardware can damage components.
We do it correctly.
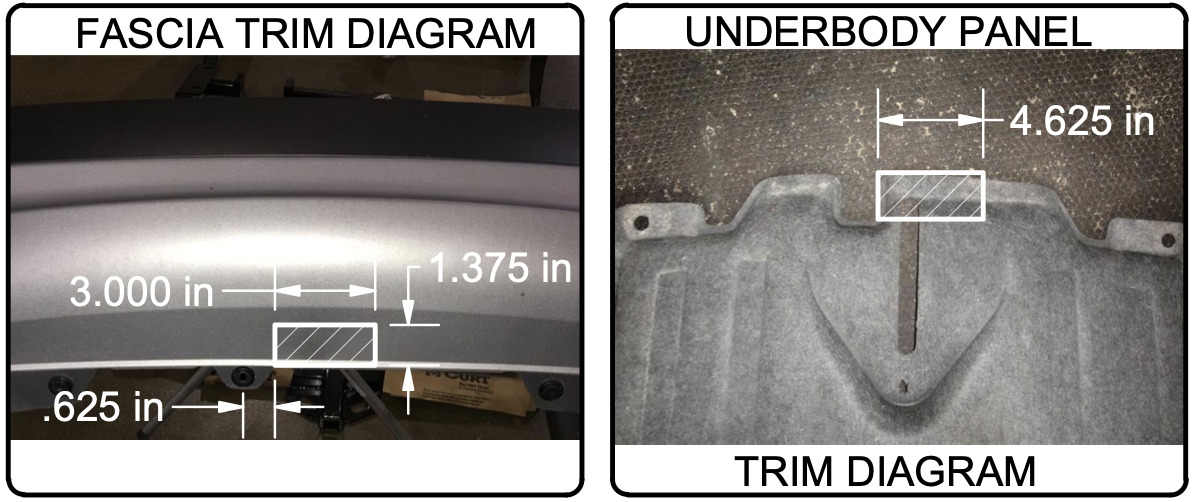
6. Precision Trimming of the Bumper Fascia
For this model year Outback, minor trimming of the lower bumper fascia is required to allow the receiver to pass through cleanly.
This trimming is measured and performed carefully to ensure a factory-quality appearance.
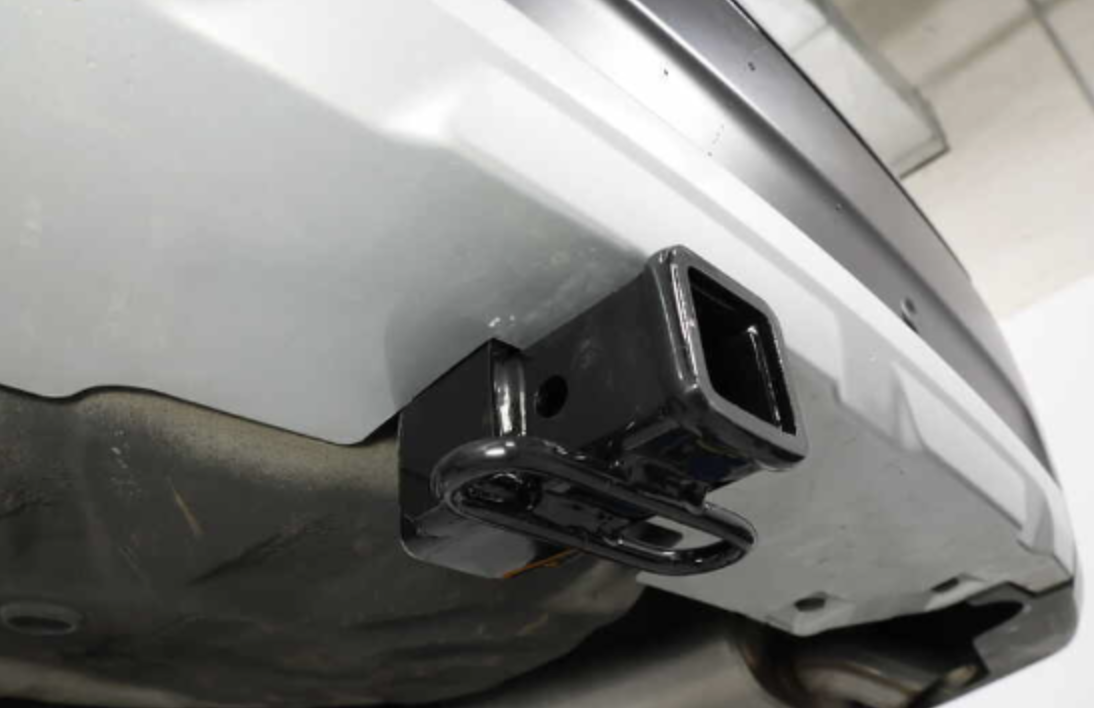
When completed, the receiver sits cleanly and professionally below the bumper.
7. Reassembly & Final Inspection
The bumper cover, mud flaps (if equipped), and all trim panels are reinstalled.
We ensure:
- Proper alignment
- No panel gaps
- All electrical connections functioning
- Clean, finished appearance
Most Subaru Outback installations are completed in 1–2 hours at your home.
Why Professional Installation Matters on the Outback
The 2020+ Outback has integrated trim, sensors, and structural components behind the bumper. Proper removal and reinstallation is essential to avoid:
- Broken clips or loose trim
- Misaligned panels
- Sensor issues
- Improperly secured hardware
Our experience installing hundreds of hitches each year means your vehicle is handled correctly the first time.