
Professional Installation
Convenient Service
Trailer Hitches
Bike Racks
Running Boards
Roof Rails

Subaru Crosstrek (2024–Present, Excluding Wilderness) Hitch Installation
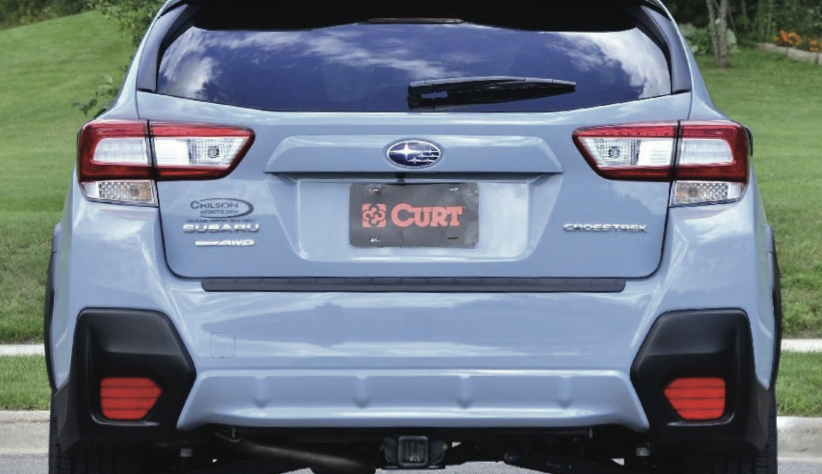
The hitch mounts to enclosed factory frame rails without bumper or exhaust removal. Frame access holes are enlarged, carriage bolts and reinforcement spacers are fishwired into position, and the hitch is leveled, secured, and torqued. Final inspection confirms alignment and clean fitment.
Towing Capacity: 3,500 lbs
Tongue Weight: 525 lbs
Installation Time: Typically up to 1 hour
Ready to Get Your Vehicle Set Up?
Skip the shop. Skip the wait.
Get your vehicle ready for lake days, mountain weekends, and family adventures — with professional installation completed at your home.
1. Confirming Fitment & Inspecting the Frame Rails
Before installation begins, we confirm the hitch application is correct for the 2024 or newer non-Wilderness Crosstrek and inspect the rear frame rails and factory mounting locations.
This model generally accepts a frame-mounted hitch without removing the rear bumper fascia or lowering the exhaust system, but the mounting area is still checked for anything that could affect fitment.
2. Removing the Required Factory Frame Plugs
Factory rubber plugs are removed from the rear frame-rail locations needed for installation, exposing the enclosed mounting area.
Only the plugs required for the hitch hardware are removed so the remaining factory closures stay in place.
3. Preparing the Hardware Access Openings
The required frame access holes are carefully enlarged just enough for the supplied carriage bolts and reinforcement spacers to enter the enclosed rails.
Precise preparation creates the needed clearance without unnecessarily altering the vehicle’s frame structure.
4. Fishwiring the Mounting Hardware
Specialized fishwires guide the carriage bolts and reinforcement spacers through the enclosed frame rails and into the designated mounting locations.
The hardware is kept controlled and correctly oriented inside the frame so each bolt and spacer seats properly.
5. Raising & Securing the Hitch
The hitch is lifted into position while the fishwires are guided through its mounting holes. Care is taken to keep the hardware from being pushed back into the enclosed frame.
The supplied high-grade fasteners are started by hand so the hitch remains supported while final alignment is established.
6. Leveling & Aligning the Receiver
The receiver is centered beneath the vehicle and the hitch is checked for even contact against both frame rails.
Where minor vehicle manufacturing tolerances require it, leveling spacers are used so the hitch sits evenly and the receiver remains properly aligned.
7. Torquing the Hardware & Inspecting Fitment
All mounting hardware is tightened and torqued to the hitch manufacturer’s specifications to create the required clamping force.
We then inspect the receiver position, hardware seating, frame contact, and overall appearance. Most installations are completed in about one hour.
Why Professional Installation Matters on the Crosstrek
The Crosstrek’s enclosed frame rails make correct hardware routing, access-hole preparation, leveling, and torque especially important. Professional installation helps prevent:
- Lost or misaligned hardware inside the frame
- Incorrectly seated reinforcement spacers
- Unnecessary frame modification
- An uneven or improperly torqued hitch
We use the correct fishwire techniques, alignment process, and calibrated torque tools to produce a secure, clean installation at your home.