
Professional Installation
Convenient Service
Trailer Hitches
Bike Racks
Running Boards
Roof Rails

Subaru Forester (2019–Present) Exposed Hitch Installation
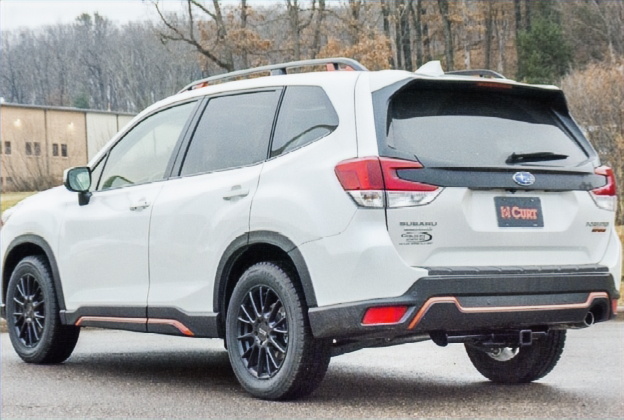
The exposed Forester hitch mounts beneath the vehicle without removing the bumper fascia or taillights. The exhaust, heat shield, and underbody panel are moved for access, frame openings are enlarged, and carriage bolts and spacers are fishwired into the enclosed rails. The hitch is torqued and all components are restored with clearance verified.
Towing Capacity: 3,500 lbs
Tongue Weight: 525 lbs
Installation Time: Typically up to 1 hour
Ready to Get Your Vehicle Set Up?
Skip the shop. Skip the wait.
Get your vehicle ready for lake days, mountain weekends, and family adventures — with professional installation completed at your home.
1. Lowering and Supporting the Rear Exhaust
Installation begins by temporarily lowering the rear exhaust system from its rubber hangers and supporting it safely. This creates the working room needed to reach the Forester’s frame mounting locations.
Depending on the vehicle’s exhaust configuration, one or both sides may need to be lowered.
2. Accessing the Frame Rails
The rear heat shield and driver-side underbody panel are removed or adjusted to expose the enclosed frame rails and factory mounting locations.
Factory hole plugs are removed while the retained panels and hardware are kept organized for proper reassembly.
3. Preparing the Hardware Access Points
The center access holes are enlarged only as required so the hitch mounting hardware can be routed into position inside the enclosed frame rails.
This controlled preparation provides access without unnecessary modification to the vehicle.
4. Fishwiring the Frame Hardware
Specialized fishwire techniques are used to route carriage bolts and spacer blocks through the enclosed frame rails.
Each piece is carefully pulled into the correct mounting location before the hitch is lifted into place.
5. Raising and Securing the Hitch
The hitch is raised beneath the vehicle, aligned with the prepared mounting points, and secured using high-grade hardware.
All fasteners are tightened with calibrated torque tools to the hitch manufacturer’s specifications.
6. Reassembly and Final Inspection
The heat shield, underbody panel, and exhaust system are returned to their proper positions and factory hangers.
The completed installation is inspected for secure mounting, receiver alignment, exhaust clearance, and clean overall fitment.